EEM Certified Practitioner Directory Tutorial
How to Login to the Site
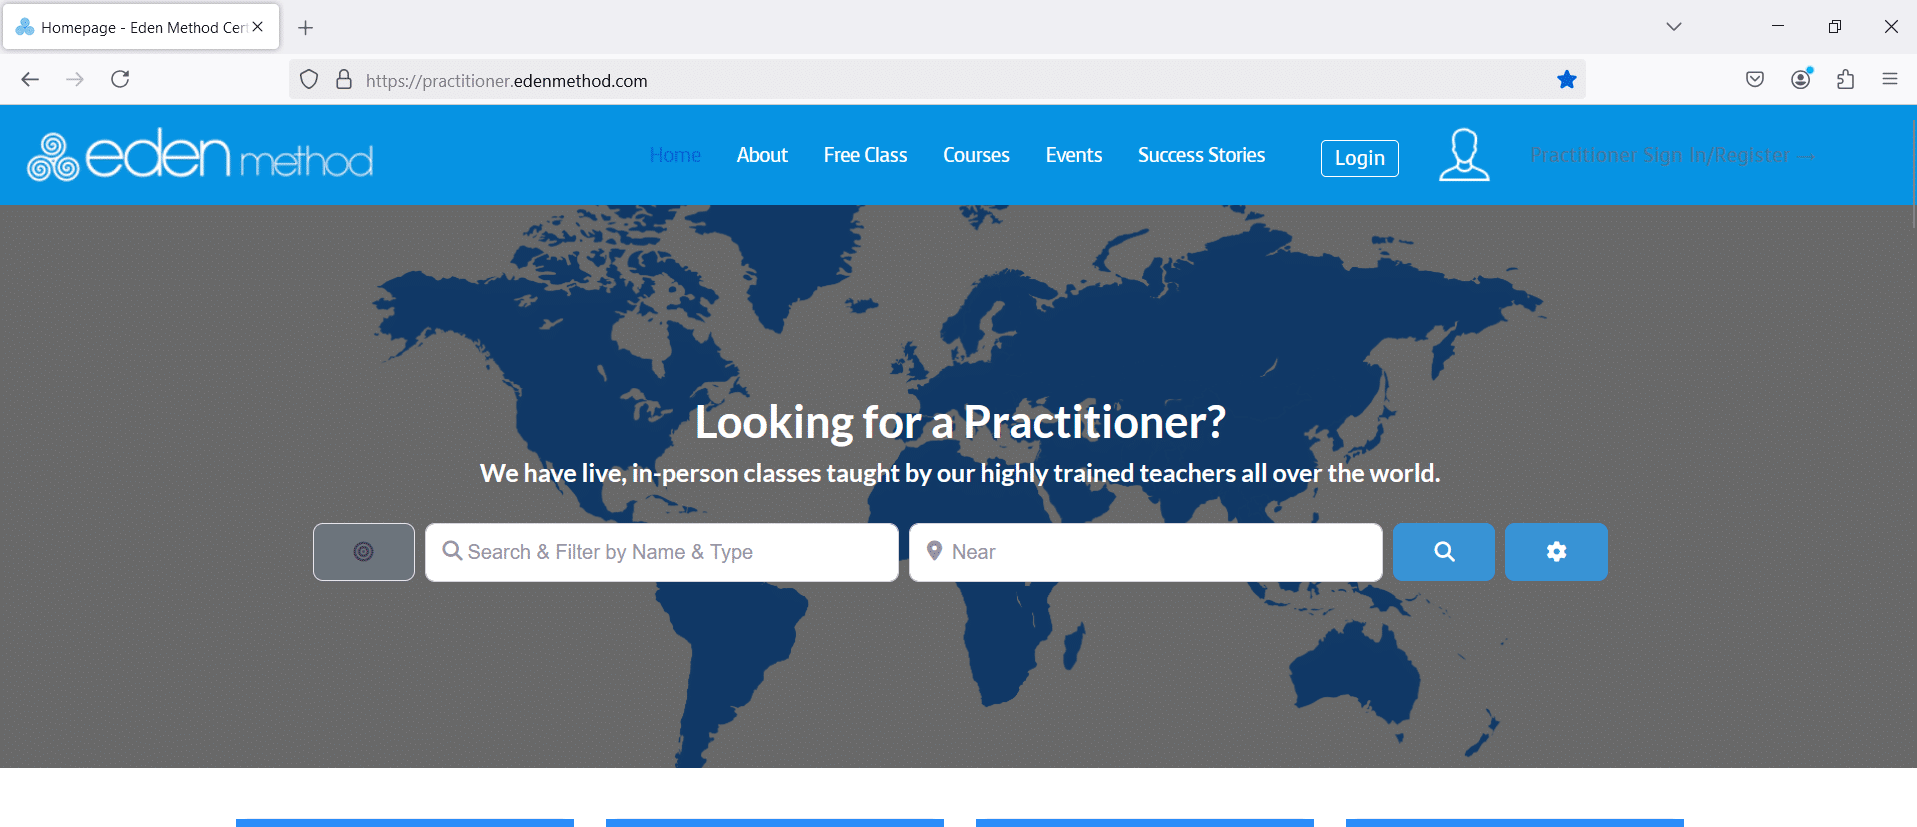
EM Directory Home Page
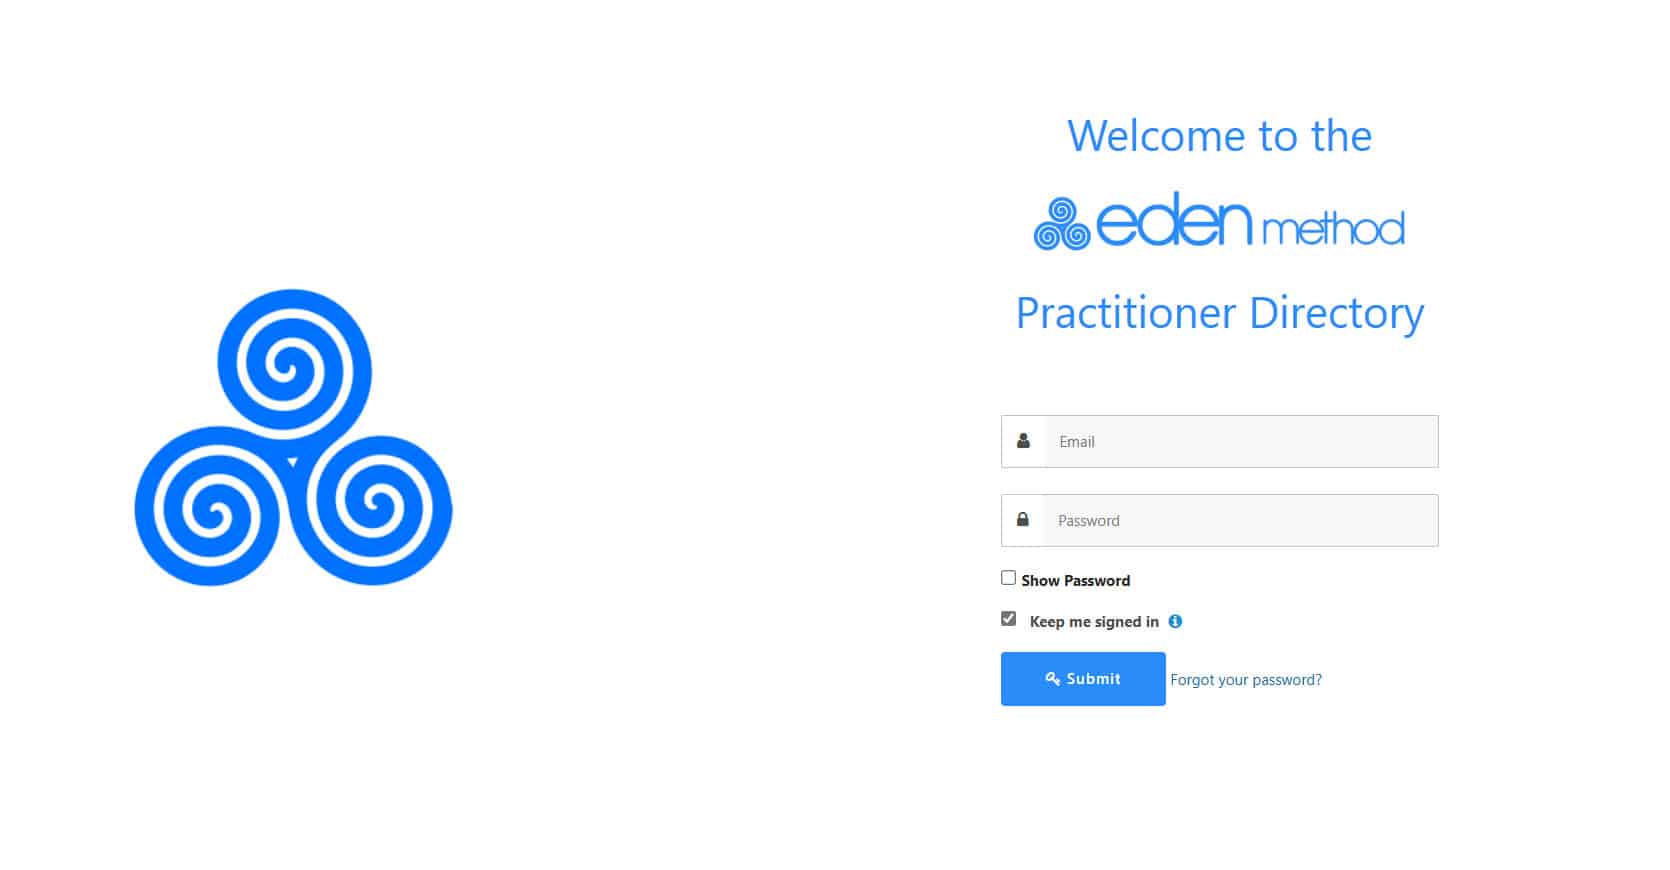
EM Directory Login Page
- Go to practitioner.edenmethod.com/wp-admin
or
- Go to practitioner.edenmethod.com
On Computer:
- Click on the Login button in the upper right corner of the page.
On Mobile Device:
- Scroll to the bottom of the page.
- Click on Login for Practitioners.
At the login screen, enter your login information and click Submit. You will be logged in and the home page will be shown.

To edit your listing, click on the profile icon in the upper right corner. You will now be on your account page.
How to Reset Your Password
- Go to practitioner.edenmethod.com/wp-admin
- Click on Lost your password? You will find this under the login box.
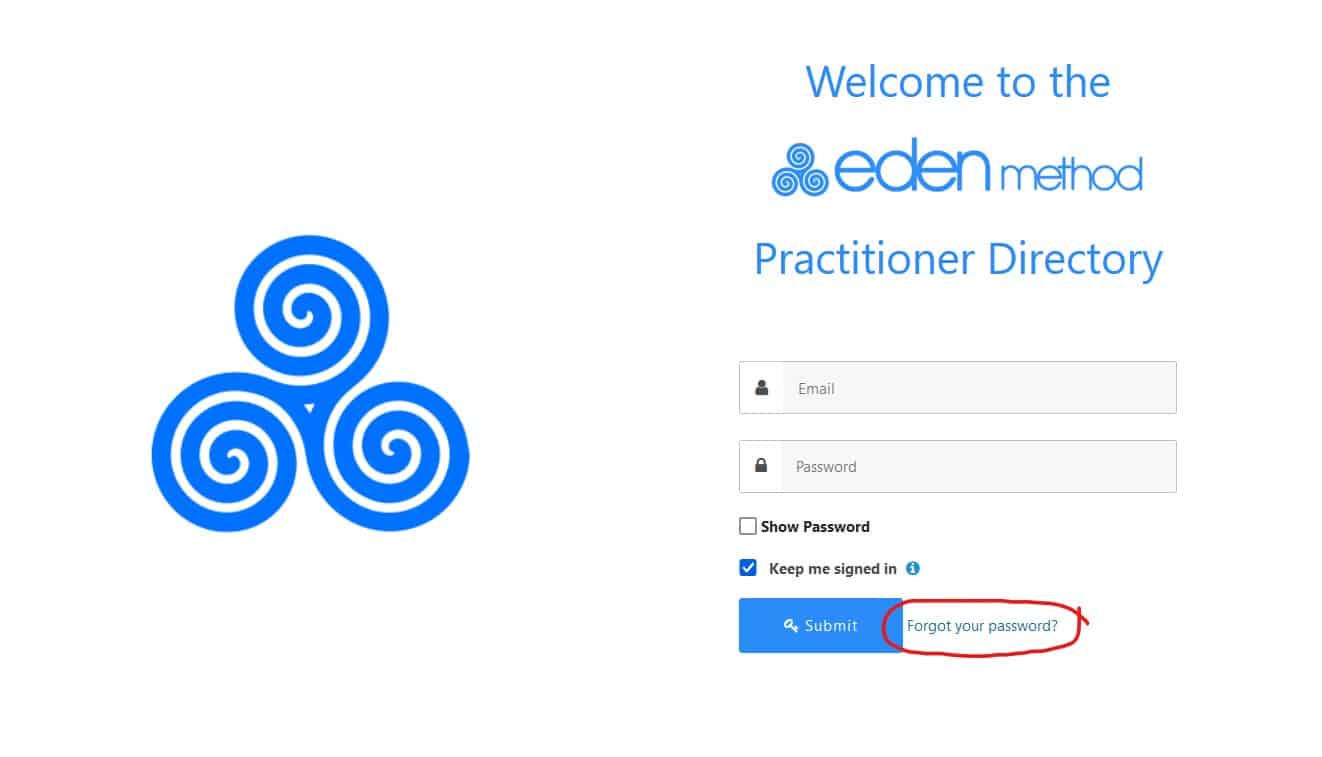
- Enter in your email address
- Click on Submit
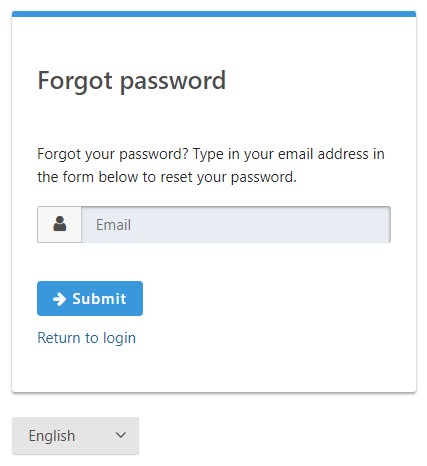
- You will receive a Password Reset email with the information on how to update or change your password. It can take 15-30 minutes to process the request. If you don't see the email please check your junk/spam/promotional file. If you have still not received it email us at [email protected].
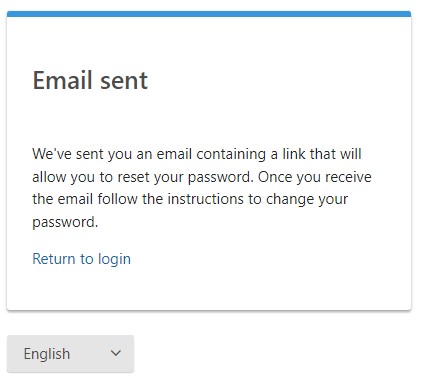
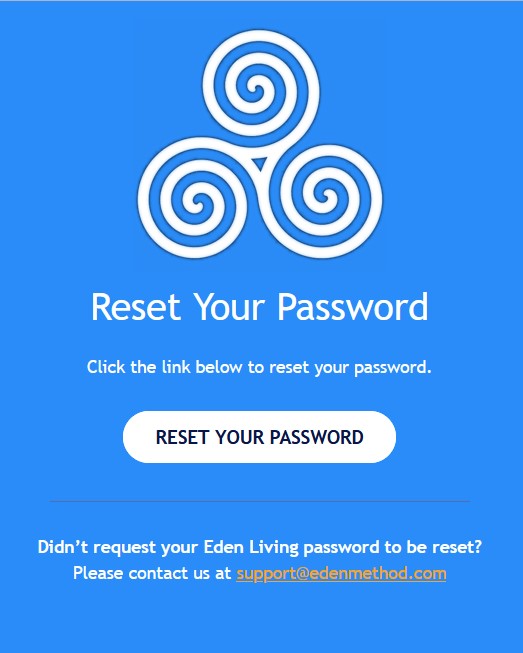
- Go to your email and open the Password Reset email.
- Click on the Reset Your Password link in the email. Or, you can copy the Password Reset link and paste it into your browser.
- Enter your new password.
- Enter your new password again to confirm.
- Click on the Submit button.
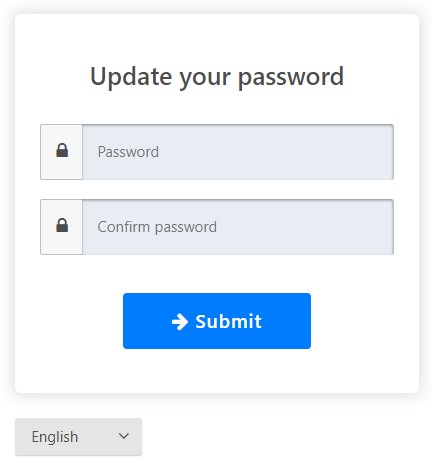
You have now reset your password. The site will now log you into the site. If it doesn't, go back to the login page at practitioner.edenmethod.com/wp-admin and use your email and new password to login.
- Click on Password Change link. You will find this in the left sidebar.
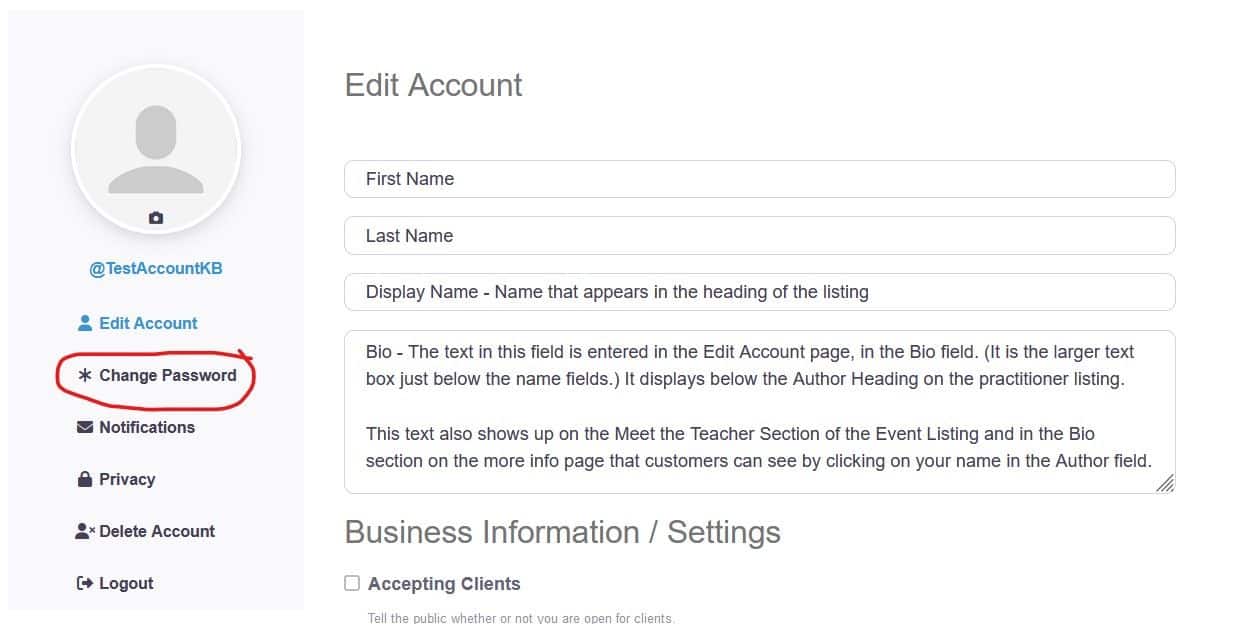
- Enter your new password.
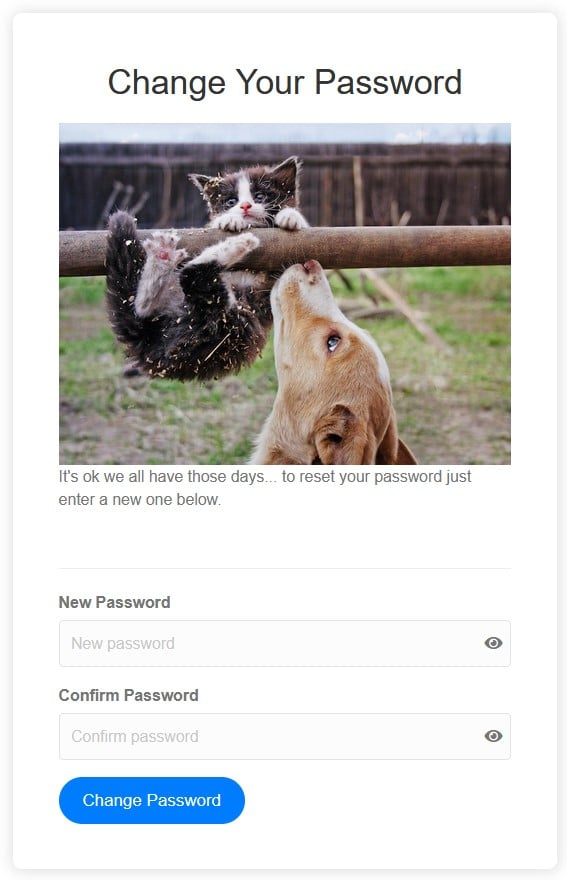
- Enter your new password again to confirm. Click on the Change Password button.
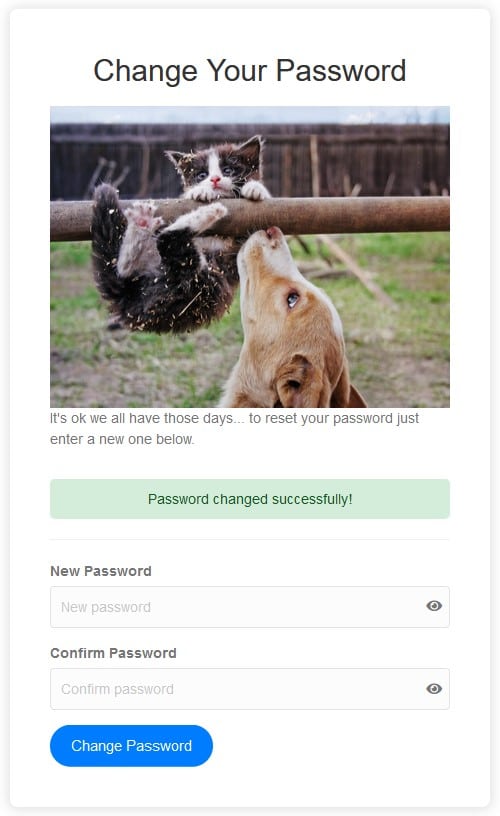
- You should receive a Password Changed Successfully notice.
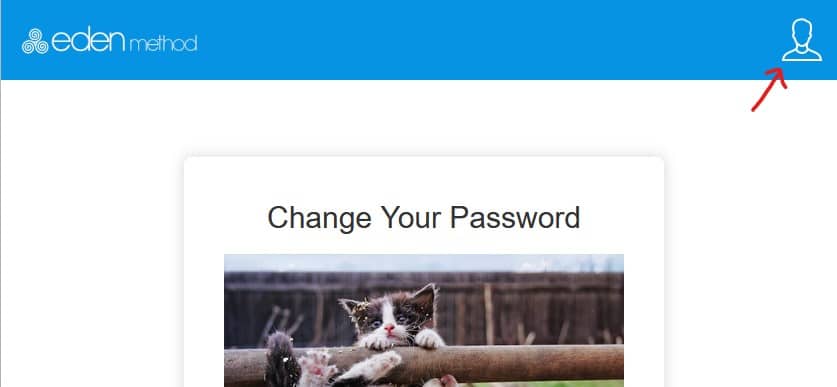
- To navigate back to the dashboard click on the profile icon in the upper right corner. This will take you back to your Account page.
How to Edit the Account Fields
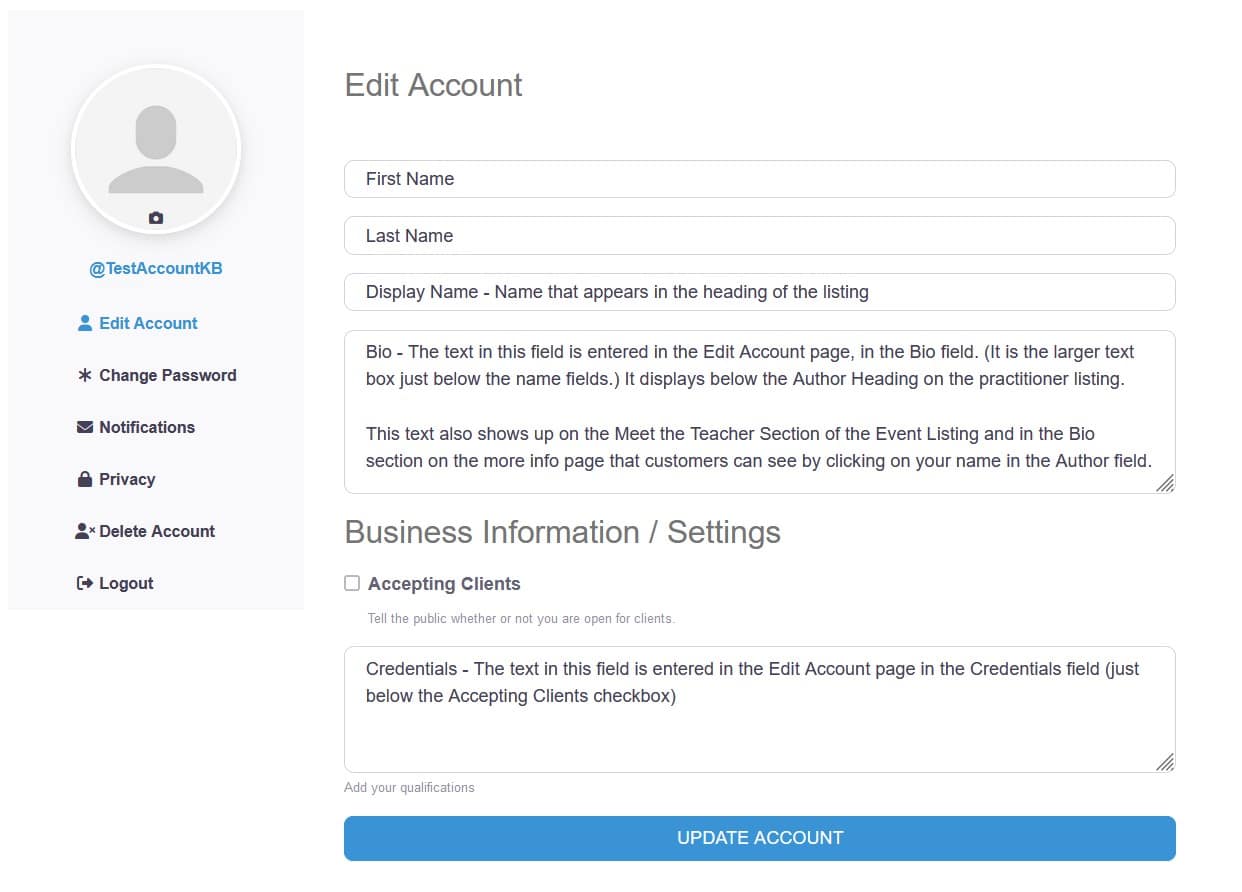
The Edit Account page is usually the first page you arrive at once you have logged into the Directory. You can also use the links in the left sidebar to navigate to the Edit Account page.
For practitioners with multiple listings, the information entered on this page will appear on each of your Practitioner Listings. For Eden Method Teachers, some of the information entered on this page will appear on your class listings.
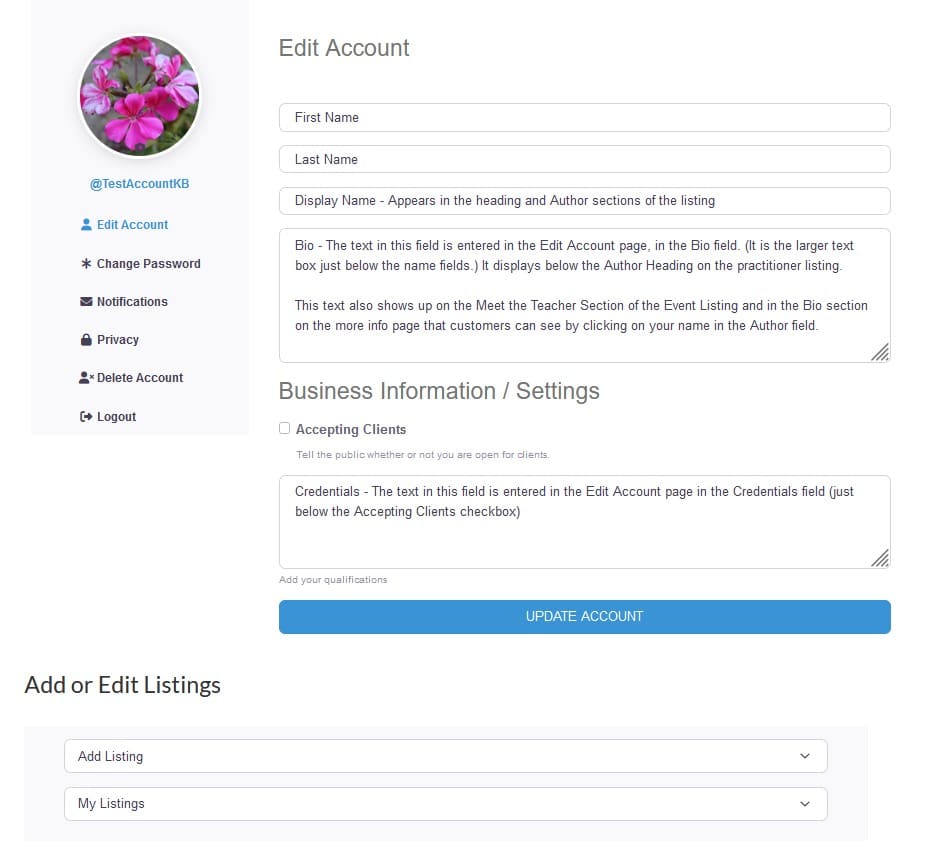
On the Edit Account page you can:
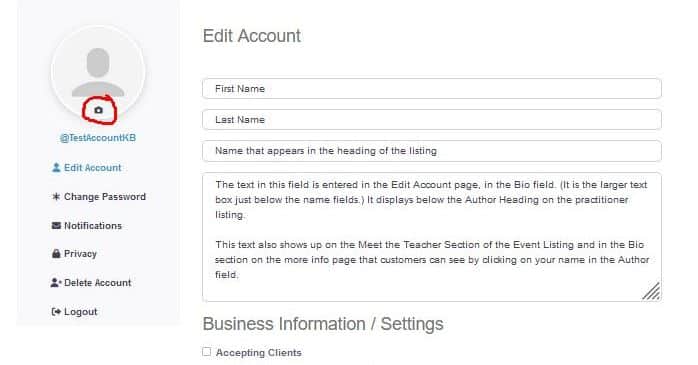
To edit the Profile Image, go to the Edit Account page. In the upper left corner you will see an image or image field. At the bottom of the image there is a little camera icon. Click on the camera icon.
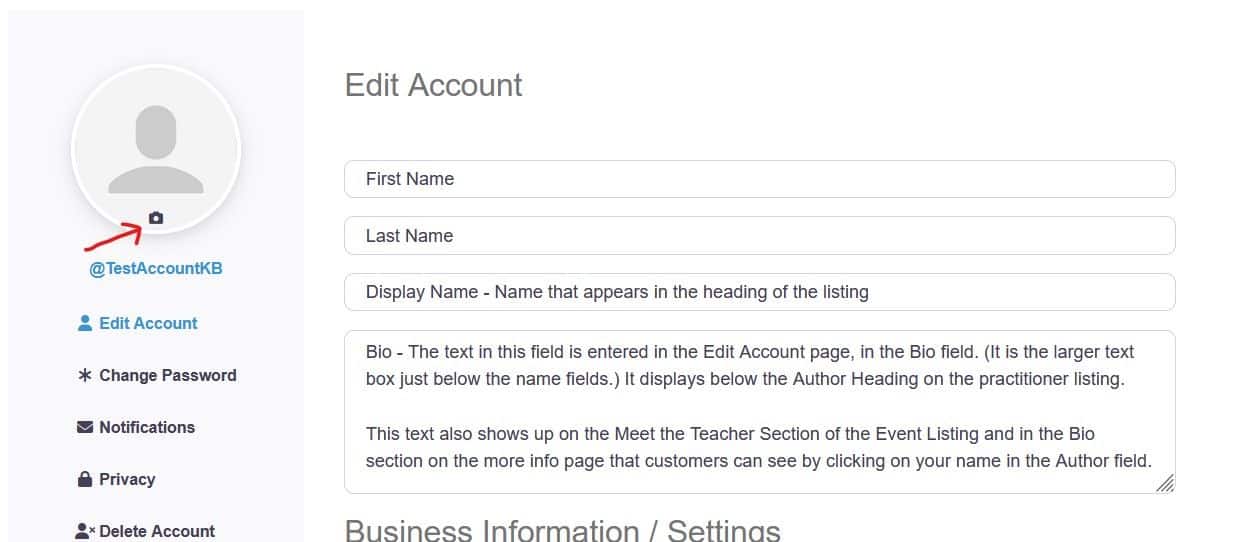
In the popup box, click on Upload Avatar. Find the image from the files on your device. The image will be uploaded to the site.

In the next popup box, you can crop your image. There will be a grayed box that you can click on and drag over the image you want displayed. You can click on the edges of the grayed box to increase or decrease the size of the area. The image does need to be square. Once you have the image as you like click the Apply button. If you want to change the image, just repeat this process until you get the image as you like.
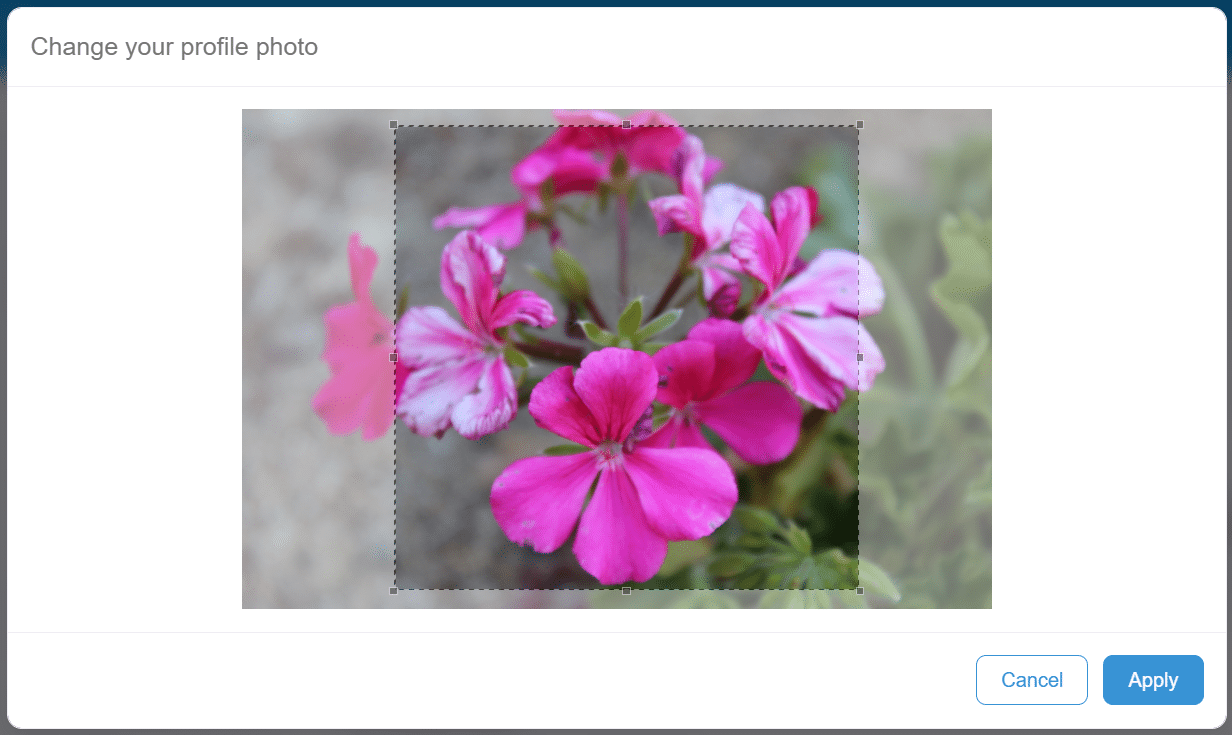
Once you have the image as you like, click on the Apply button.
- To edit this field go to the Edit Account page.
- Find the Display Name field (shown below).
- Enter the text you would like to appear.
- Click the Update Account button.
Here is where the Display Name field is located in the Edit Account section:
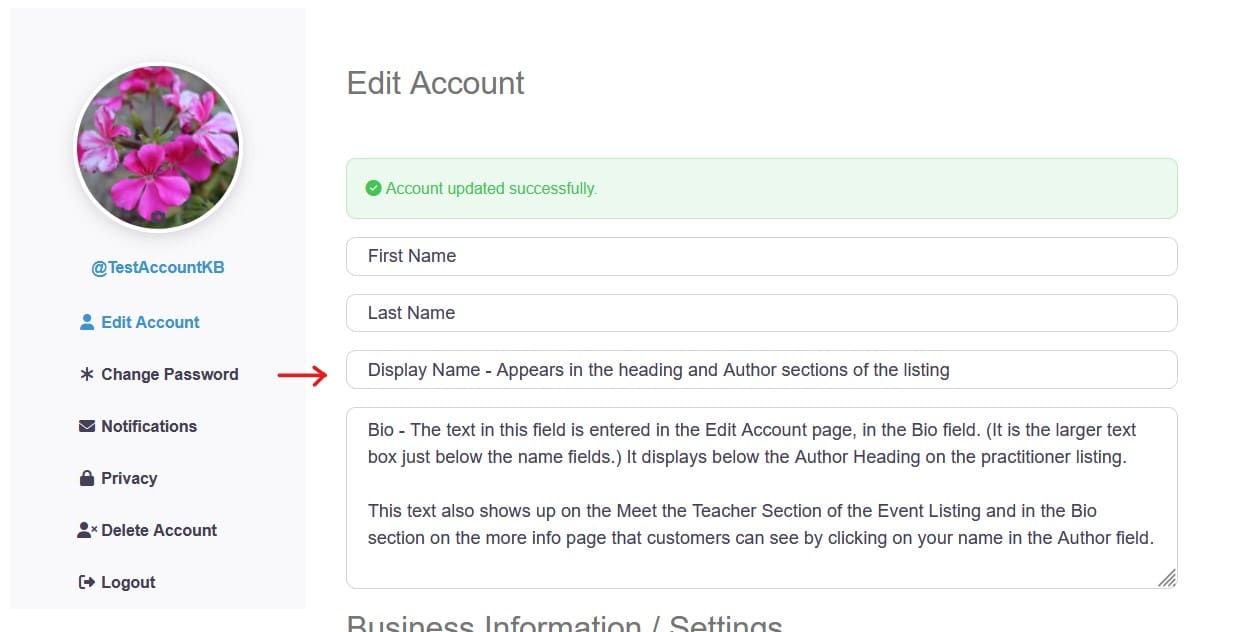
Here is where the Display Name field appears on the listing:

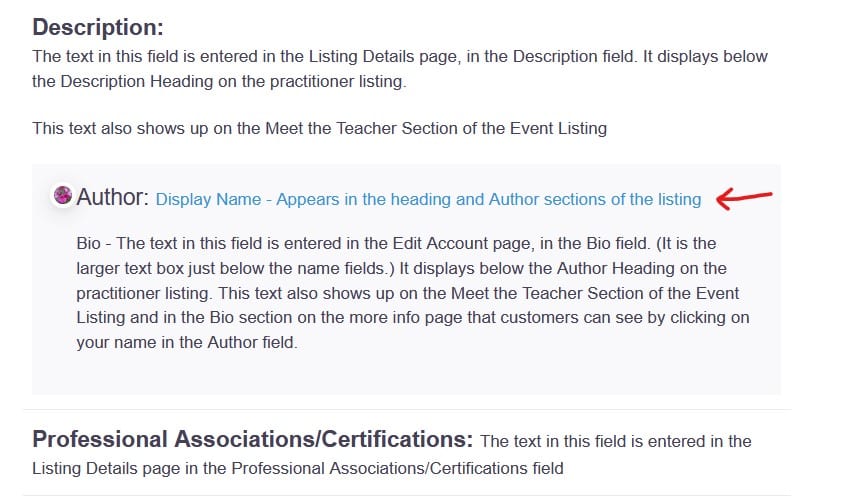
- To edit the Bio field go to the Edit Account page.
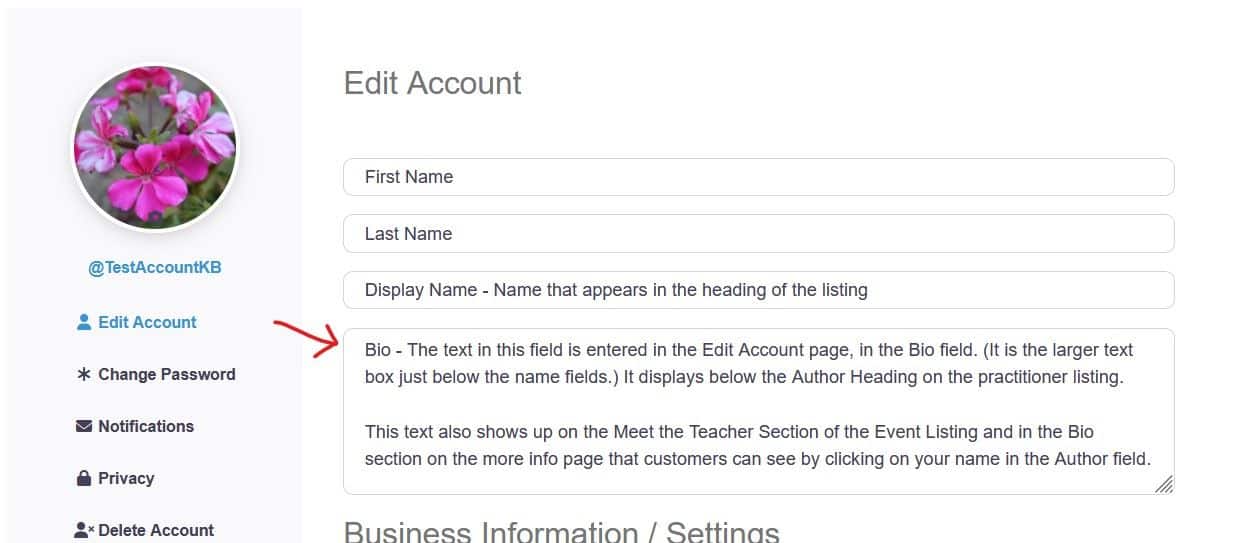
- Find the Bio field (shown below).
- Enter the text you would like to appear.
- Click the Update Account button.
Here is where the Bio field is located in the Edit Account section:
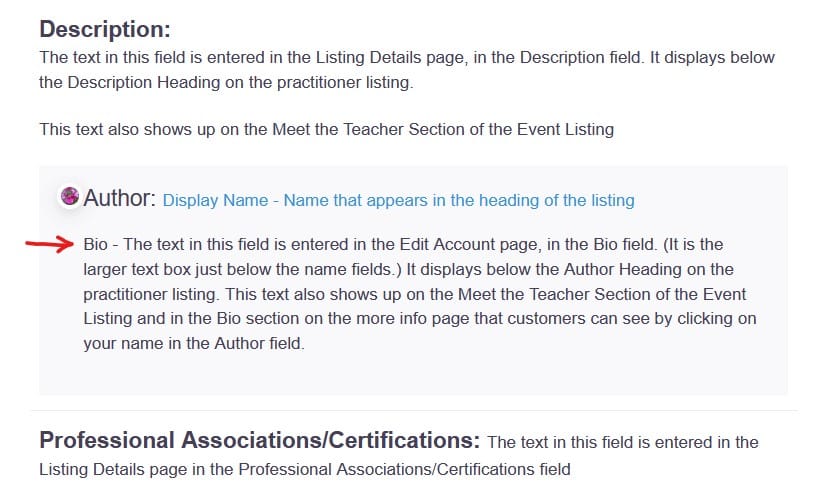
Here is where the Bio field appears on the listing:
- To edit the Accepting Clients field go to the Edit Account page.
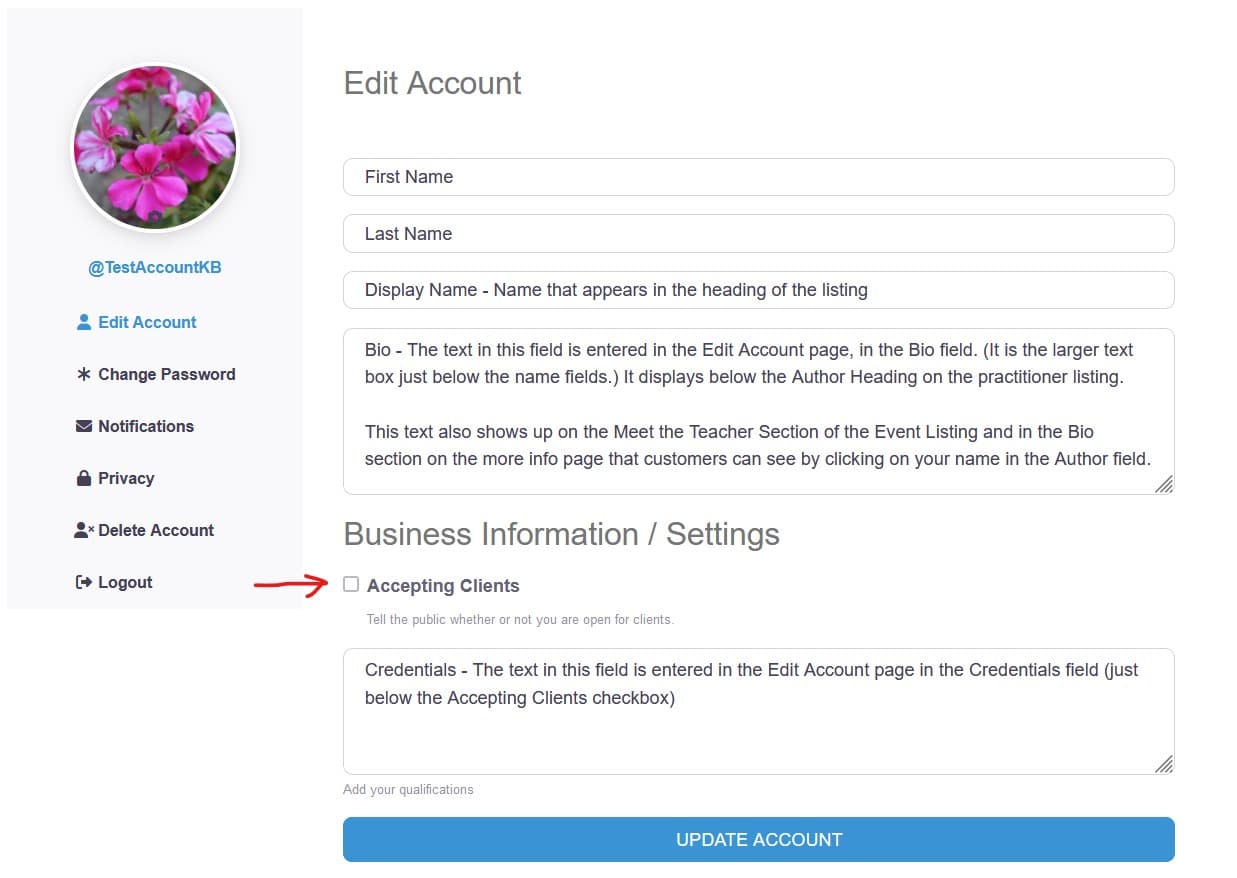
- Find the Accepting Client checkbox field (shown below).
- Click the box if you are Accepting Clients.
- Click the Update Account button.
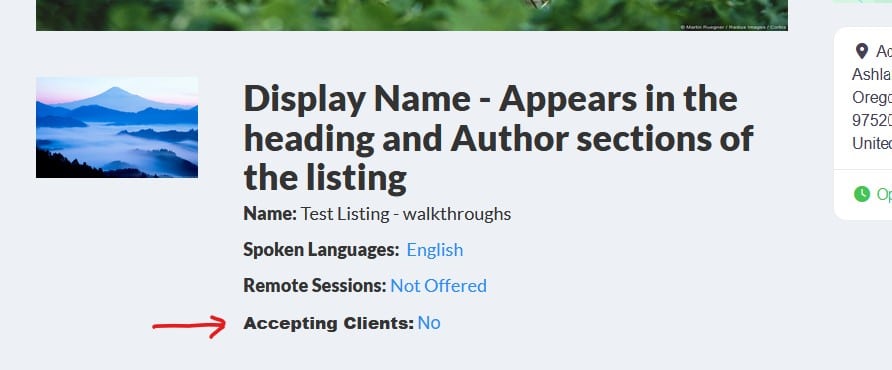
Here is where the Accepting Clients checkbox field is located in the Edit Account section:
Here is where the Accepting Clients field appears on the listing:
- To edit the Credentials field go to the Edit Account page.
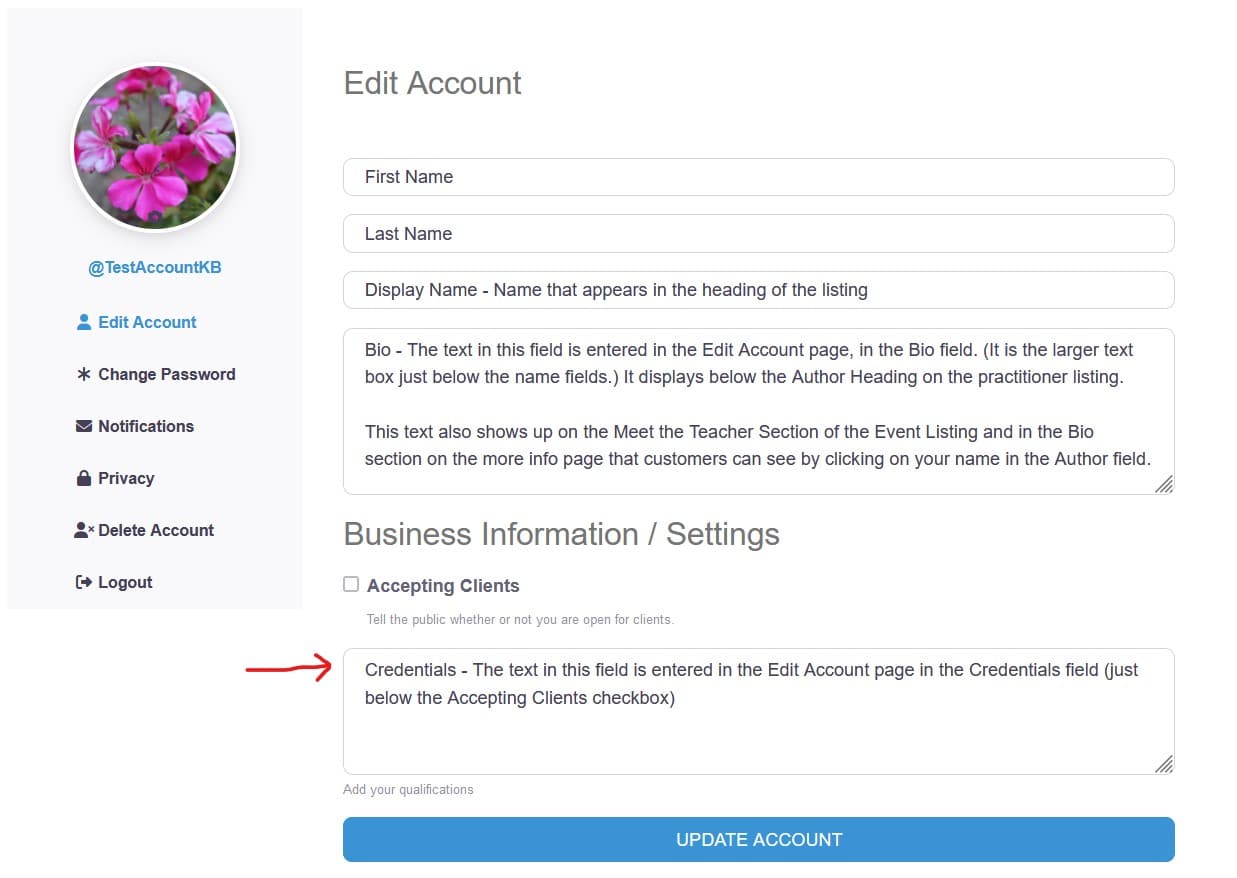
- Find the Credentials field (shown below).
- Enter the text you would like to appear.
- Click the Update Account button.
Here is where the Credentials field is located in the Edit Account section:
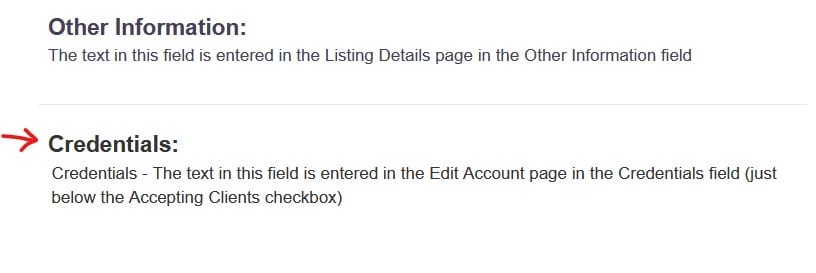
Here is where the Credentials field appears on the listing:
How to Create/Edit a Listing
How to add a listing:
- Scroll to the bottom of the account page.
- Click on the Add Listing dropdown field.

- Select Practitioners

Enter your listing details.
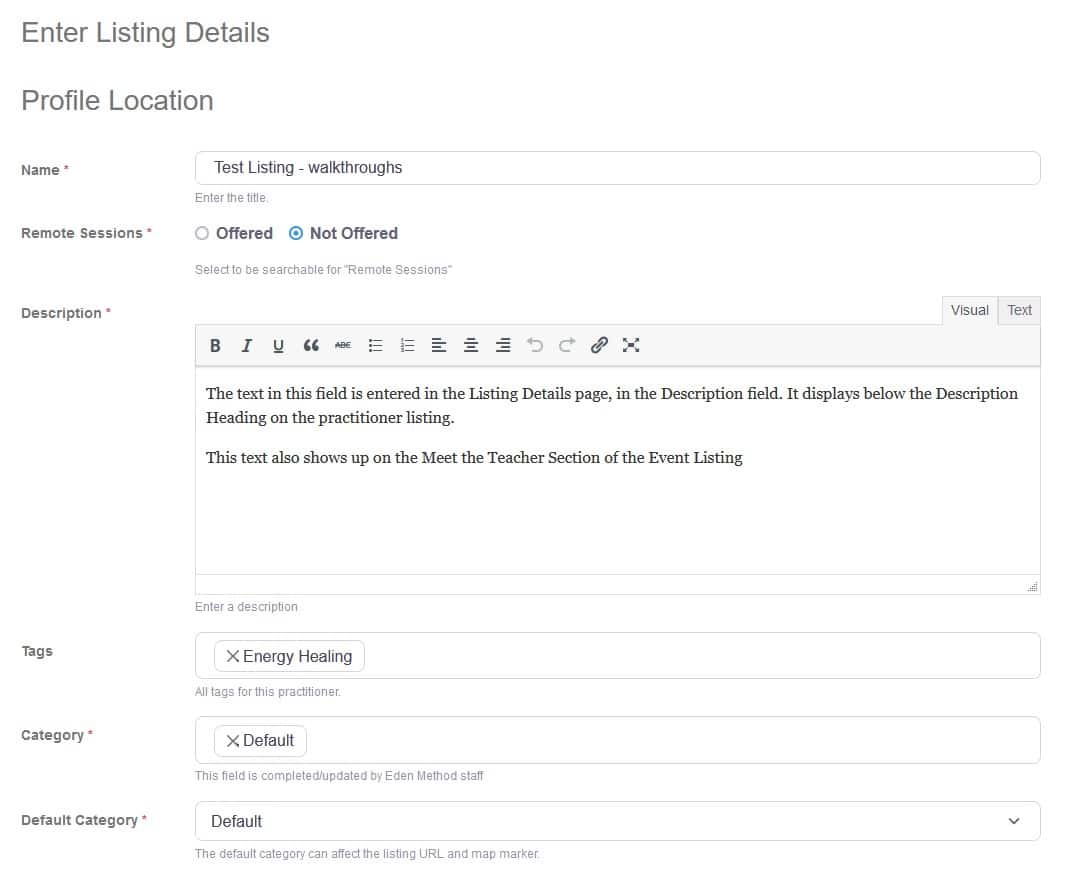
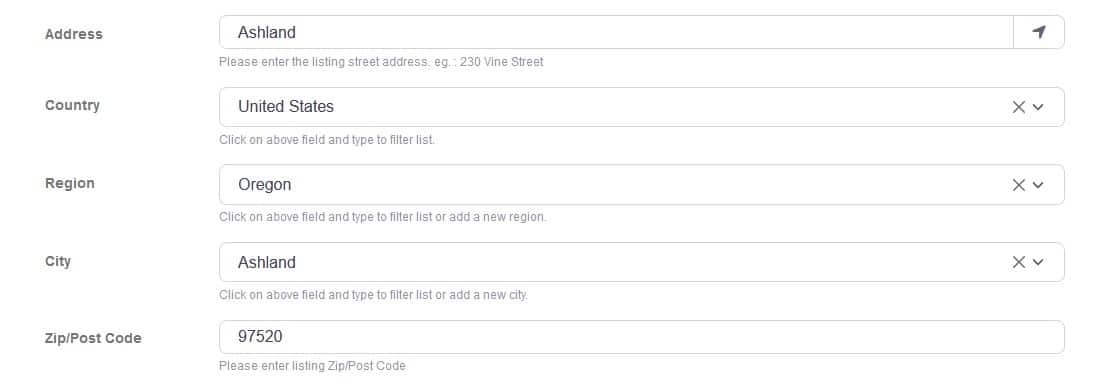
- Enter your address information. In the Address field start typing your address. For those that only want to show the city and not the full address, they can start by typing in the city. As you type the system will suggest an address. Once the system has suggeseted the correct address, click on the suggestion. The system will then fill in the Country, Region, City and possibly the Zip/Post Code fields.
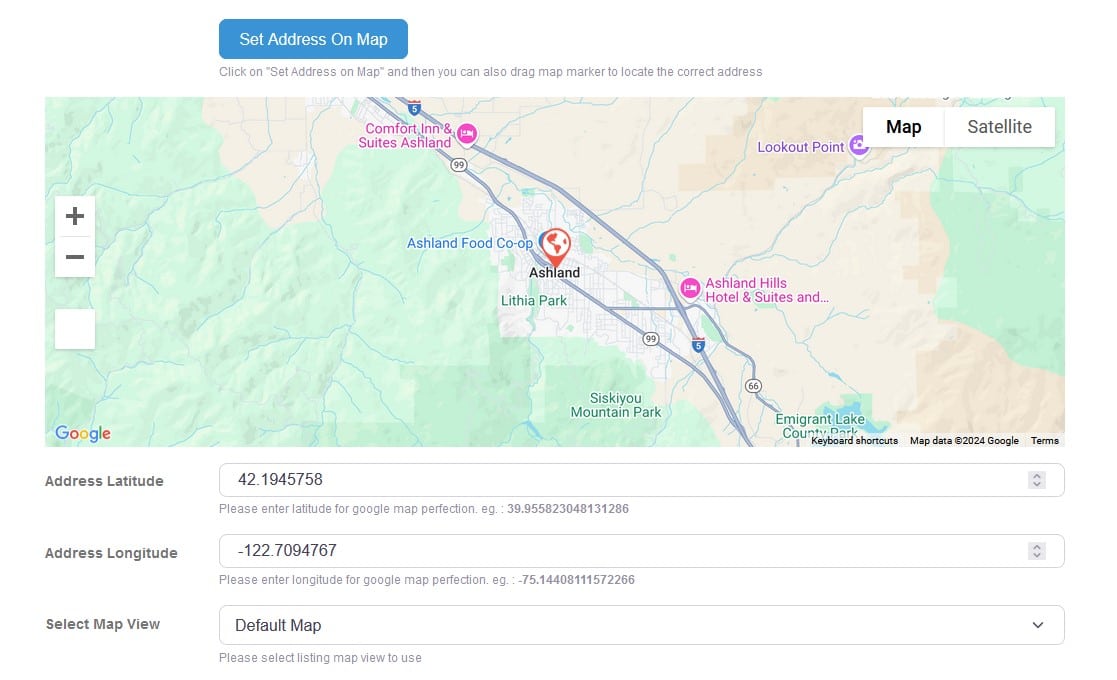
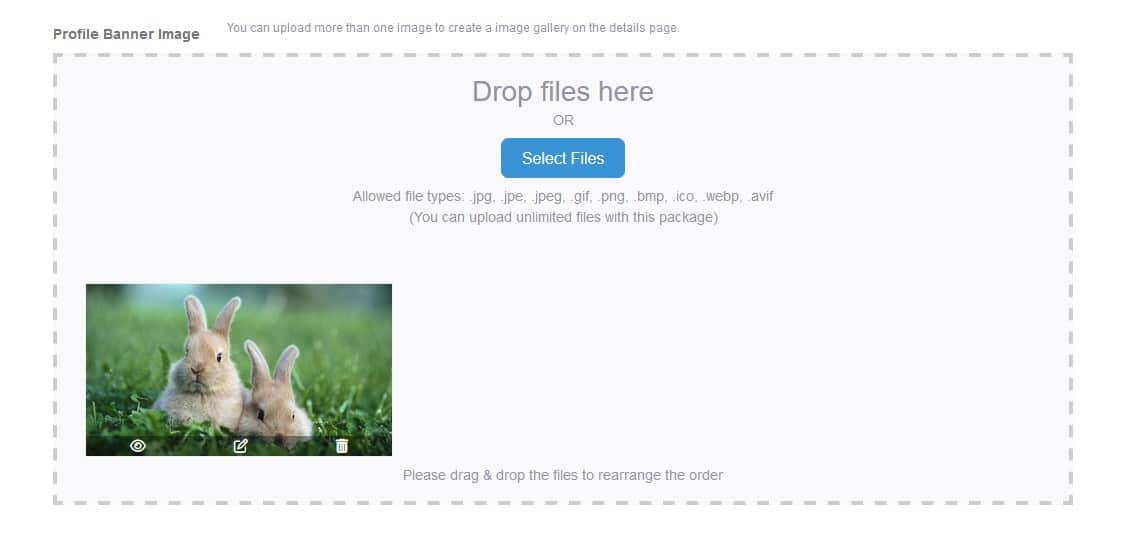
- Upload your profile banner image.
- Enter your phone number.
- Select your spoken languages. (This is a required field).

- Enter more contact information.
- Note: when entering a website it must have the http:// part of the link or your listing will not submit. If you are editing a listing that has a website, before you submit verify that the http:// part of the link is entered into the field, even if you didn't edit the website field.

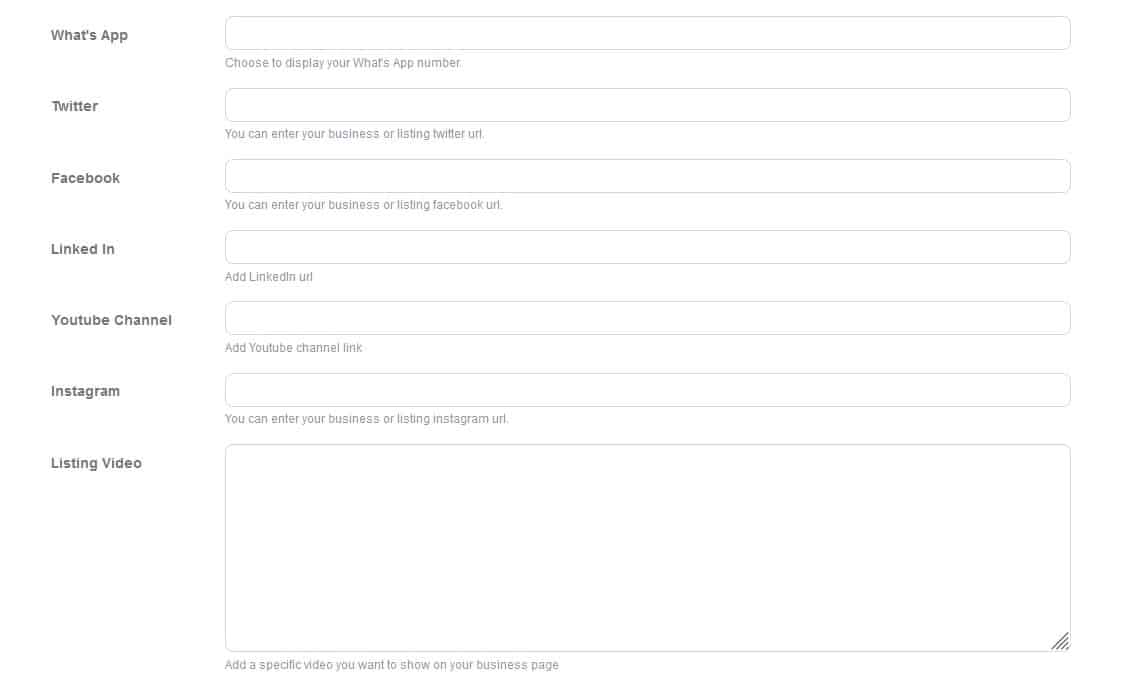
- Enter your social media information.
- Select if you want to show your price range.
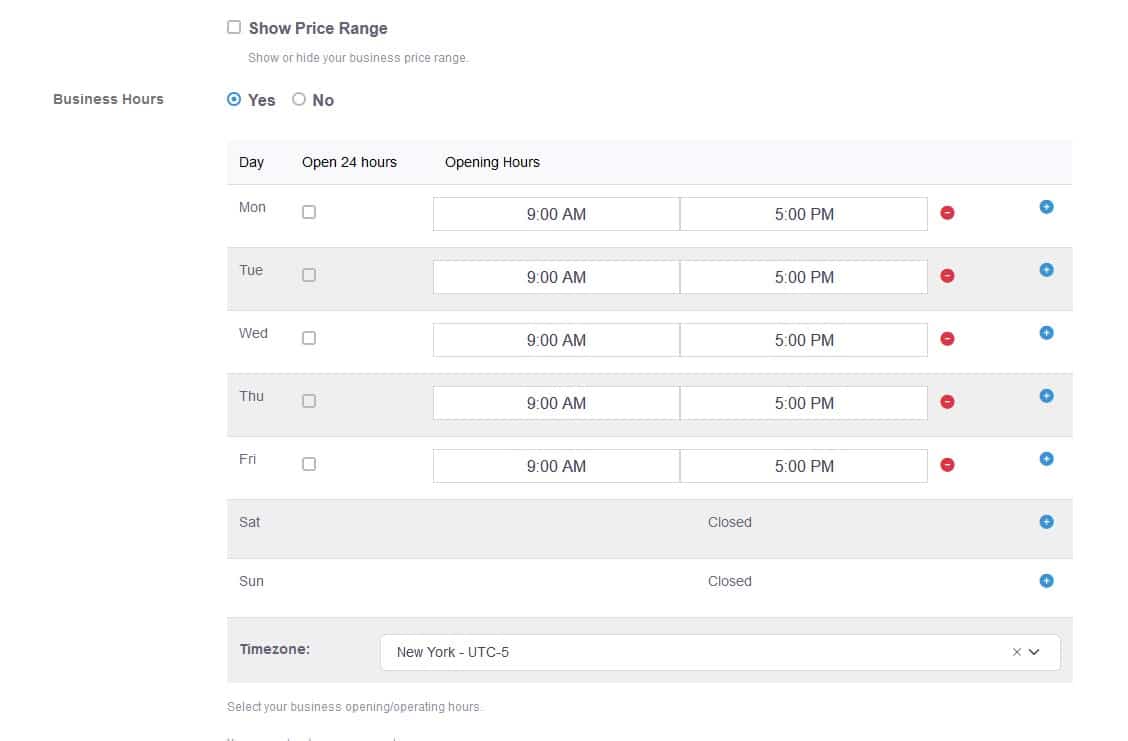
- Enter your business hours.
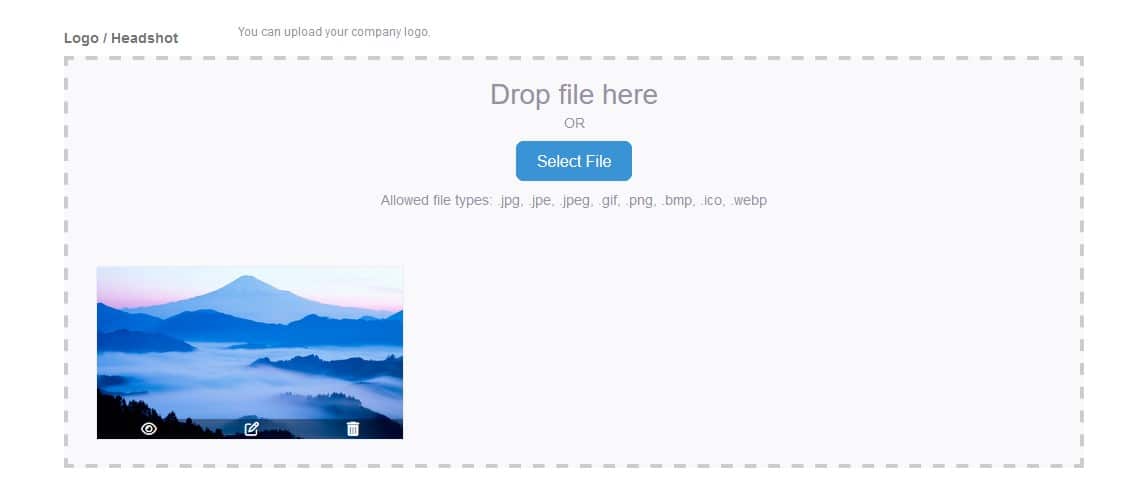
- Upload an image for your Logo / Headshot.
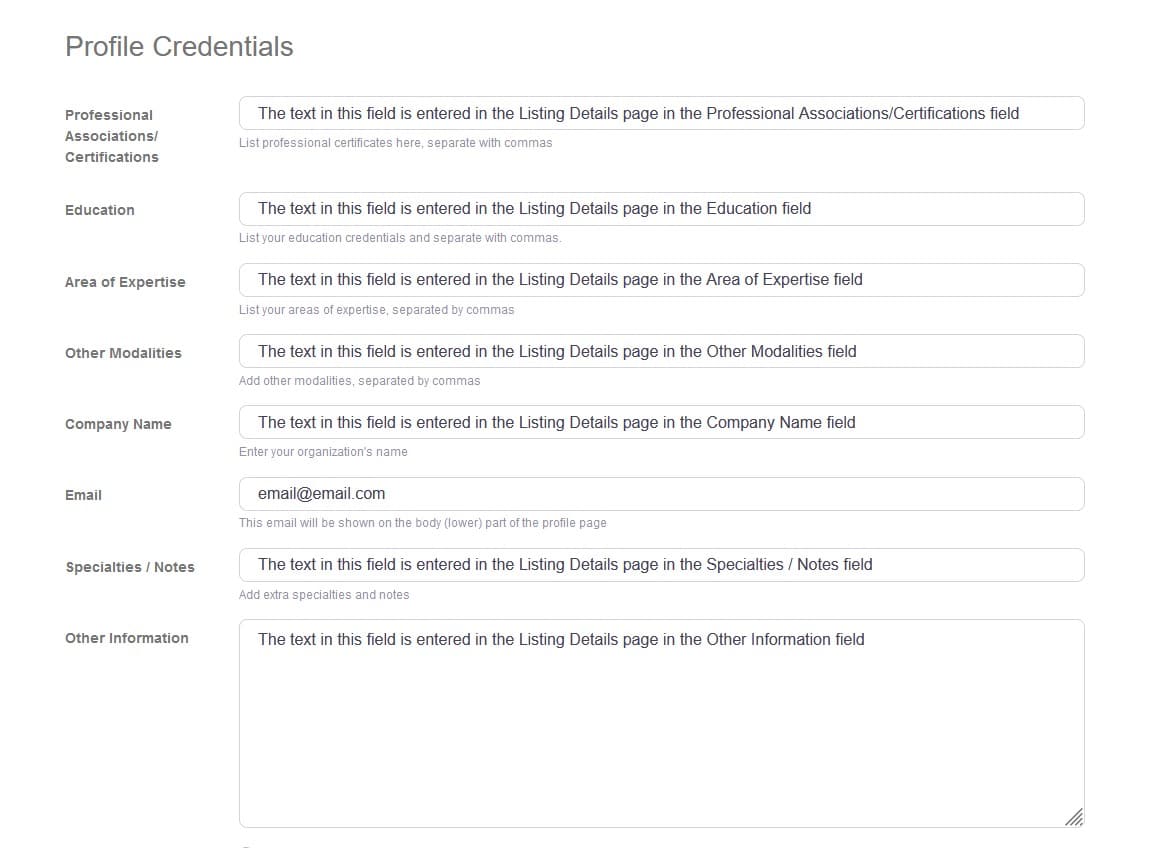
- Enter more details for your listing.
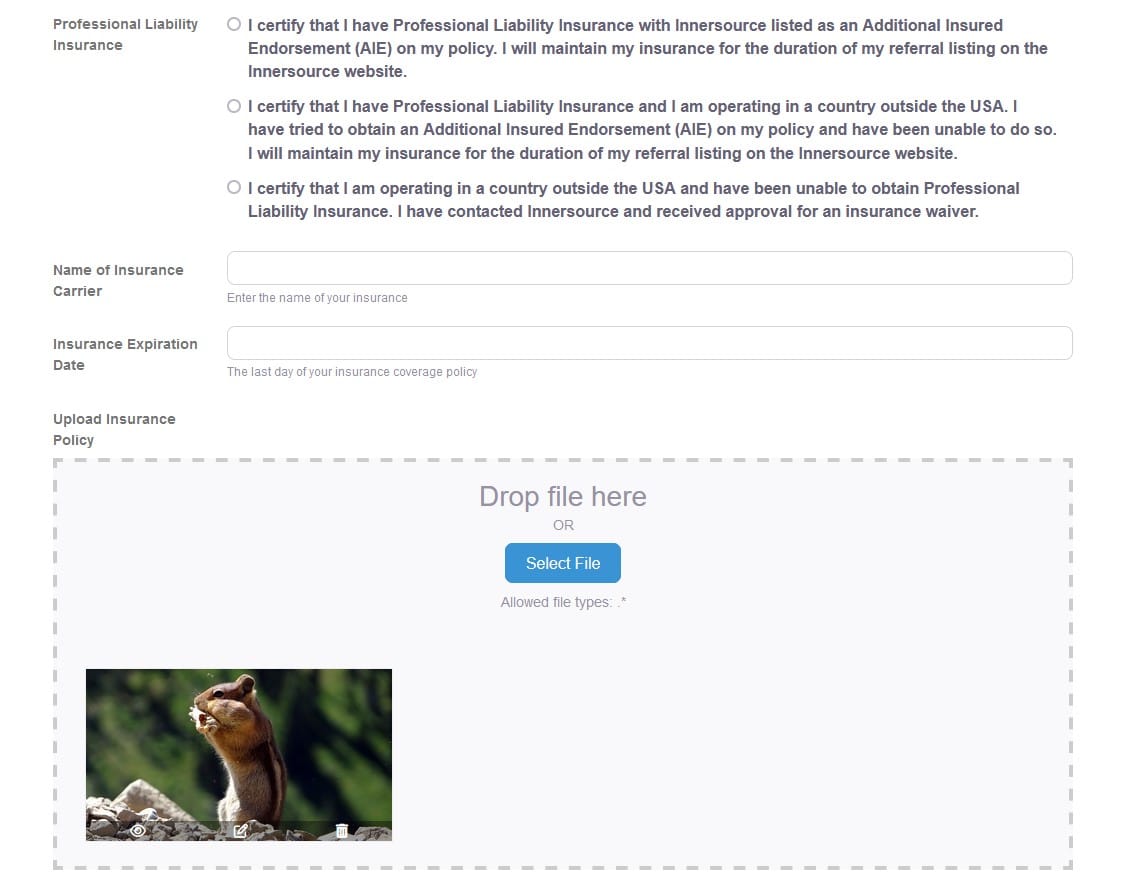
- Enter your insurance information. (Your insurance information will not be published. It is for internal use only.)
- Enter any comments you may have for the Innersource Staff. (The Comments For Innersource Staff field will not be published. It is for internal use only.)

- Click the Preview Listing button to preview the listing.
- Click the Submit Listing button to complete the listing.
If you preview your listing and find that you have changes you would like to make, you can still make them. Even after you have submitted your listing.
To edit your listing, go back to the Account page.
- Scroll to the bottom of the page.
- Click on My Listings.

- Select Practitioners.

You are now on the Listing Page. If you have more than one practitioner they will all be shown here.
- Find the listing you want to edit.
- Click on the 3 vertical dots that are located in the lower right corner of the listing module.
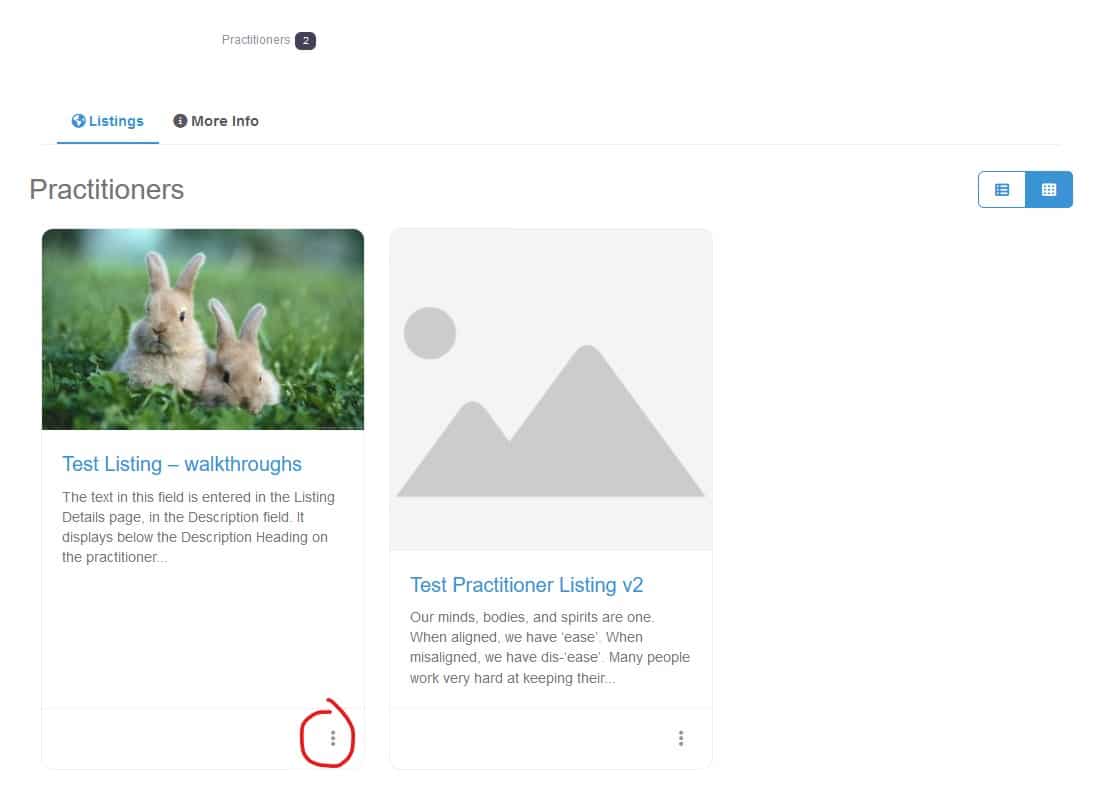
- Select Edit from the pop up window.
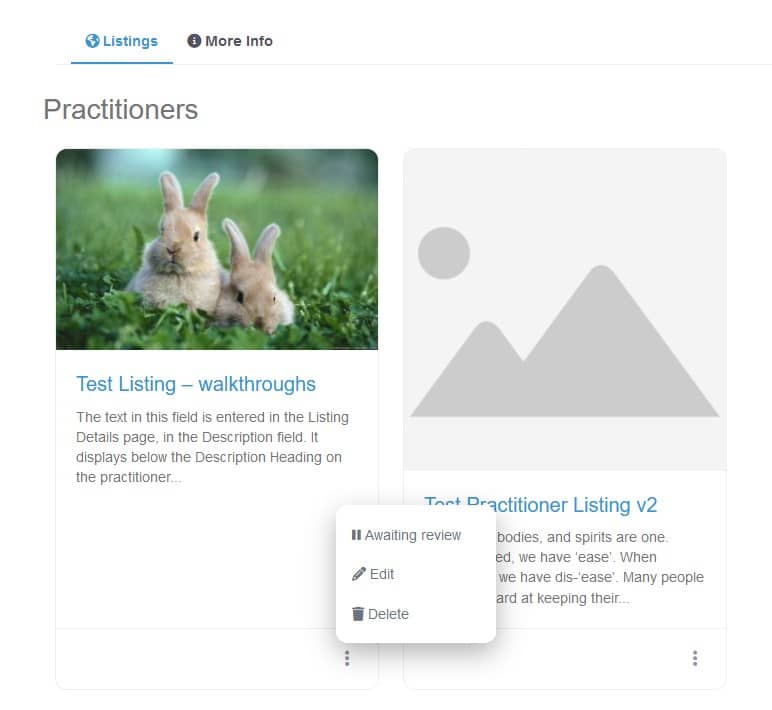
You should now be on the listing form. You can make as many changes as you like. Make sure to click Submit Listing when you are done.
Once we receive your listing, we will review it for approval. When the listing is approved, you will receive an email from us letting you know the listing has been posted to the website.
How to edit your listing:
- Go to the Account page.
- Scroll to the bottom of the page.
- Click on My Listings.

- Select Practitioners.

You are now on the Listing Page. If you have more than one practitioner they will all be shown here.
- Find the listing you want to edit.
- Click on the 3 vertical dots that are located in the lower right corner of the listing module.

- Select Edit from the pop up window.

You should now be on the listing form.
Edit your listing details.

- Edit your address information.


- Upload a new profile banner image.

- Edit your phone number.
- Select your spoken languages. (This is a required field).

- Edit other contact information.
- Note: when entering a website it must have the http:// part of the link or your listing will not submit. If you are editing a listing that has a website, before you submit verify that the http:// part of the link is entered into the field, even if you didn't edit the website field.

- Edit your social media information.

- Select if you want to show your price range.
- Edit your business hours.

- Upload a new image for your Logo / Headshot.

- Edit more details for your listing.

- Enter your insurance information. (Your insurance information will not be published. It is for internal use only.)

- Enter any comments you may have for the Innersource Staff. (The Comments For Innersource Staff field will not be published. It is for internal use only.)

- Click the Preview Listing button to preview the listing.
- Click the Submit Listing button to complete the listing.
Images
There are three different fields where you can enter images, the Profile Banner Image, the Logo/Headshot, and the Profile Photo. This shows where each of these fields are displayed on your main listing:
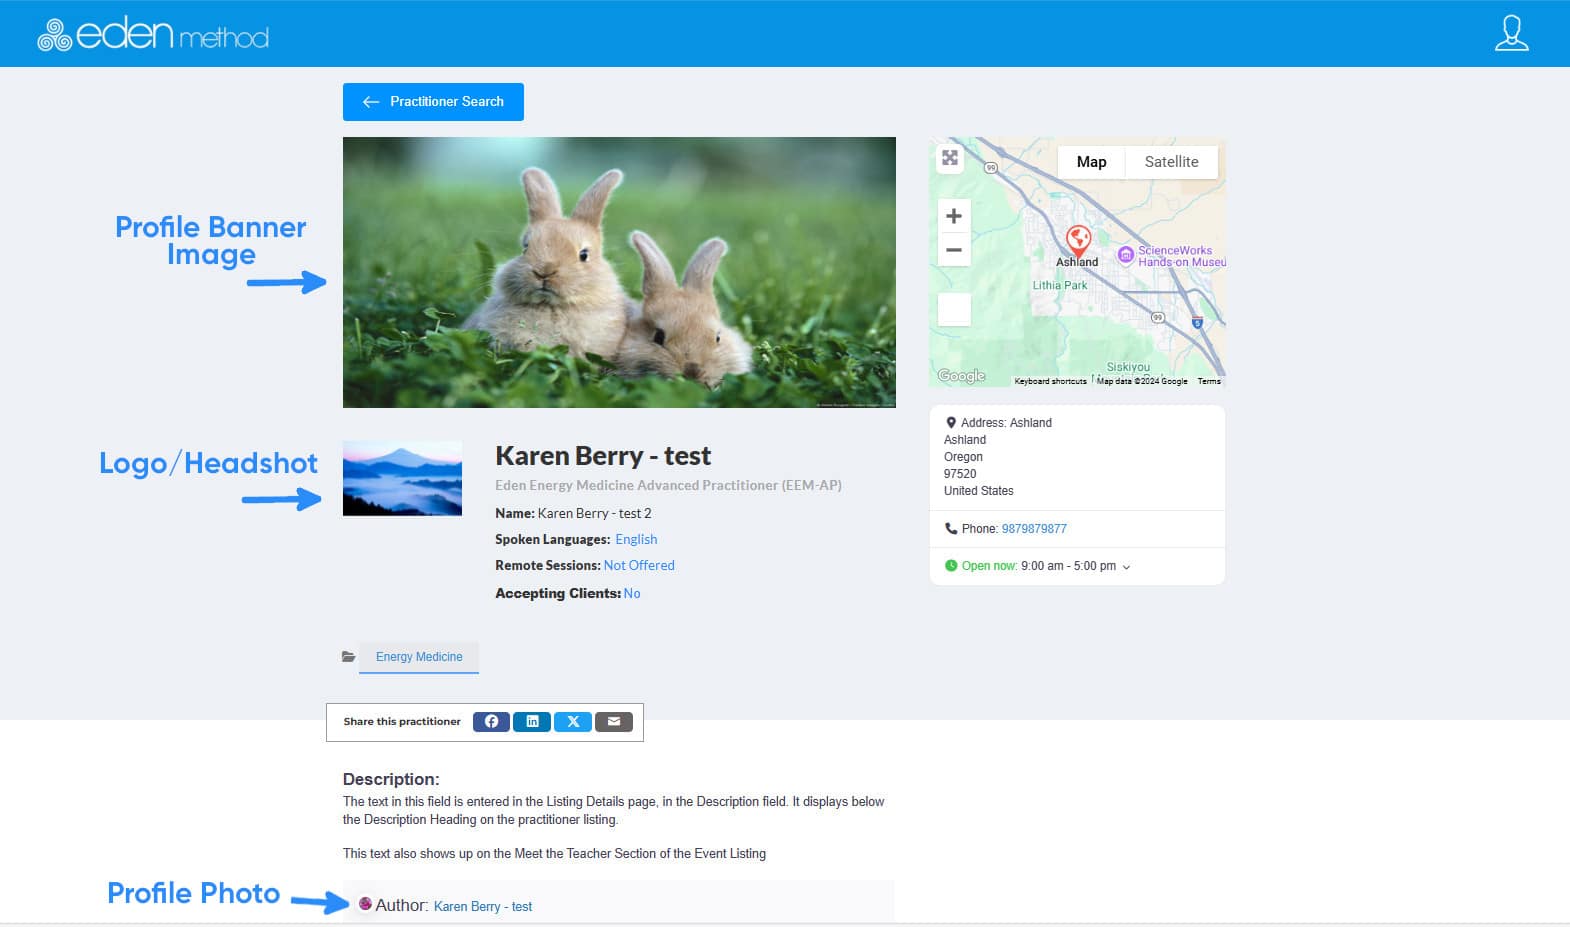
To edit your Profile Banner Image, go to your Listing Details page. This field is found about a third of the way down the page, below the address/map fields.
To change your image, drag and drop your new image into the field or use the Select Files button to select the image you want to use.
You can upload multiple images, but only one image will be displayed on the listing. The image that is displayed is the image that is farthest to the left. In this example the bunny image would be displayed. If you have more than one image added, you can click on the images and move them to change the order.
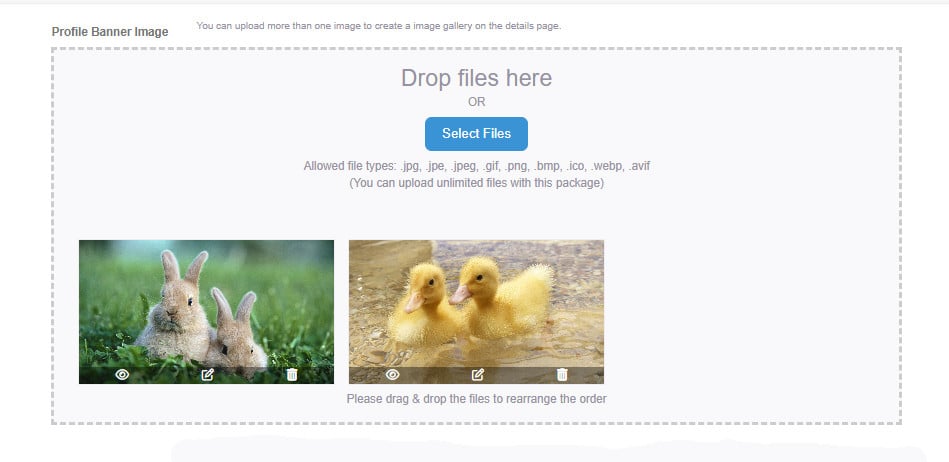
To edit the Logo/Headshot, go to the Listing Form.
This field is found about halfway down the page, below the hours area.
To change your image, drag and drop your new image into the field or use the Select Files button to select the image you want to use.

To edit the Profile Photo, go to the Edit Account page. In the upper left corner you will see an image or image field. At the bottom of the image there is a little camera icon. Click on the camera icon.
In the popup box, click on Upload Avatar. Find the image from the files on your device. The image will be uploaded to the site.

In the next popup box, you can crop your image. There will be a grayed box that you can click on and drag over the image you want displayed. You can click on the edges of the grayed box to increase or decrease the size of the area. The image does need to be square. Once you have the image as you like click the Apply button. If you want to change the image, just repeat this process until you get the image as you like.

Once you have the image as you like, click on the Apply button.